New Jersey City Backyard Window Gates and Doors
|
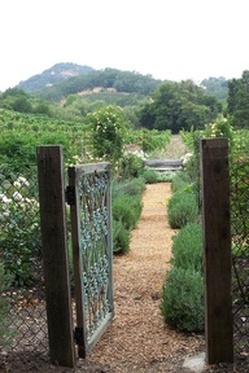
Fences provide privacy, protect your yard from trespassers, and contain your children and pets. You can choose any fence and gate design, too; just look through books and magazines and find the ones you like. After your land is surveyed and your fence is up, it is time to install your gate. Take time installing it so that it swings properly and does not sag -- and enlisting the help of a friend is not a bad idea either. Does this Spark an idea?
Instructions Determine the location where you want your gate to be before installing your fence. Mark out this location on the ground so you do not put fencing in that area. Locate your gate where it is convenient for you to open and use |
|
Dig your post holes with a post-hole digger or auger. Your holes should be 36- to 42-inches deep and 6-inches wider than the posts themselves. For areas that freeze in the winter, use a 42-inch hole. You don't want your post to move when the ground freezes, so make sure your posts are at least 3-feet longer than the height of your fence. Gate posts should be dug a little deeper than the rest of your fence posts in order to support the gate swinging.
Add 3 to 4 inches of gravel to the bottom of the post holes and insert your post. Mix your concrete according to manufacturer instructions, and pour it into the holes until it is at ground level. Remove all the air out of the concrete by using a thin piece of wood or metal to poke the air bubbles. Push the piece of wood or metal to the bottom of the concrete to remove air bubbles all the way through the concrete. The concrete will move back into place without the air bubbles.
Level your post using a level. Attach a 2 x 4 board to both posts using two screws on each post when they are level to keep them level while the concrete dries. Let your posts sit for at least five to seven days so the concrete is dry before you install the gate.
Determine the direction you want your gate to swing. Gates should open toward the center of your property.
Lift your gate into place and hold it there. Position it above any vegetation that is under it or snow that may block it so the gate will easily swing open. Level the top of the gate with the tops of the fence. Mark the location where you want your hinges on both the gate and post. Mark all of the holes where you will drill and screw the hinge into place.
Drill holes in the post and install the hinges on the post. Drill the holes in the exact location you marked when you had the gate held up to the posts. There are typically three holes in each hinge, but this will differ based on the hinge you choose. Put the hinge brackets into place and bolt the hinges to the gate post. Leave the bottom hinge loose until the gate is leveled and installed.
Install the latch on the opposite side of the fence. Position the latch on the gate post and the gate to make sure it fits and swings properly. The latch should be installed where there is a 2 x 4 support on the gate to give the latch added support. Mark the drill holes on the gate and the post. There will typically be two holes on the post and two to four holes for the latch, but this will depend on what latch you purchase. Remove the latch, and drill the holes you marked. Screw the latch into place and try your gate. Open and close it to make sure the latch works properly.
|

|
|
At WGD, 13 members (myself included) of the Indy Meetup Photo Club will be displaying images depicting the theme subjects in images taken during photo excursions in the core areas of Indianapolis. The first link in the lead paragraph of this post takes you to the event's promotional page on Facebook. That page includes detailed information about the show, a few sample pictures by other photographers ... and mentions that if you cannot attend tonight's First Friday event, the exhibit will remain up and accessible to visitors through November and during the Landmarks Center's normal business hours, which are 9 a.m. to 5 p.m. Mondays through Fridays.
With this post, I include samples of a gate, door and window image that I'll be displaying in the exhibit. All three are among my newest photographs -- taken within the past month. |

|
